Posts

Showing posts with the label cardmaking

Natures Textures Hexagon - 2 Cards

Image
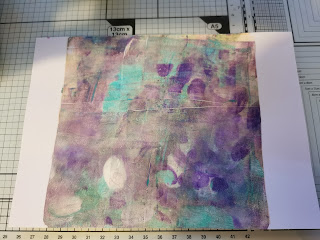
 Hello Papercrafters, I recently went to the Stamperama in Bridgwater, which is a show filled with stamp vendors. I bought lots of lovely things that I will show in another blog post.  One of the products I purchased was a stamp and stencil set by Angela Poole. It includes 2 stencils and a stamp set with a very arty style. For these two cards I used both stencils and lots of the stamps. Products: Angela Poole Natures Textures Hexagon Set Concord & 9th Paradise Dies Ranger Distress Matte Collage Paste Ranger Distress Oxide Inks : Wild Honey & Ground Espresso Versafine Claire Nocturne Ink Vintage Handwriting Paper   Process: I started this card by just having a play on an a4 piece of thin white cardstock. I used both stencils with Distress Oxide ink in both Wild Honey and Ground Espresso. I applied the ink using a small finger dauber. I moved the stencils around to get a random effect across the page. Then I opened up the stamps, I selected a few of the small flower...

Hello Retro!

Image
  Hello Papercrafters,   How are we already half way into another week, this year is disappearing before I have chance to blink! I have been working on this cute little card, using products from my recent haul. If you would like to watch my crafty hauls, head over to my youtube channel.  This card is giving me retro 70's vibes, anyone else think so?   Products I used:  Simon Says Stamp Hello Die Concord & 9th Mod Turnabout Stamp Distress Oxide inks - Spiced Marmalade, Antique Linen, Peeled Paint and Faded Jeans Sentimentally Yours Charming Squares Die Set Zig Wink Of Stella Brush Pen       Method: The first step in making this card, was using the turnabout stamp, these are great fun and easy to use. I used my Tim Holtz Stamping Platform when using this stamp. First I stamped with Spice Marmalade, then wiped the stamp, rotated it 90 degrees and reinked with antique linen. After stamping that, I repeated the process with the other colours. ...

Valentines Card Series 2024 - Day 2

Image
 Hello Papercrafters, Welcome to Day 2 of Valentines cards! I am really loving this pink and black card I made, clean and simple. The products I used: Simon Says Stamp Hugs & Kisses Dies Limetree Crafts Cardstock Enamel Dots Embossing Folder Sentimentally Yours Charming Collection, Charmed Rectangles I hope you all had a wonderful Valentines day, I will be posting Valentines cards for a few more days. I had lots of fun making cards this year. Thank you for visiting my little craft space! Ellie x

Valentines Card Series 2024 - Day 1

Image
 Hello Papercrafters,  Its been a flipping long time!! Lots of things have changed and I feel happier for it. So we are plunging back into cardmaking and I couldnt be more excited. This is the first of several cards I am making for Valentines, this little cutie is one of my faves. Products I used: Mama Elephant Zodiac Ox Stamps and Dies Concord & 9th Stitched Heart Card Front Die  Love Die & Shadow Die Pink Enamel Dots (Unknown brand) Concord & 9th Basket Weave Card Front Die Blank White 250gsm Card Blank Limetree Crafts Pink Cardstock  Anna Marie Black Cardstock Zig Clean Colour Real Brush Markers I loved colouring these cute little Ox's, its a fairly simple card to achieve and can be recreated in lots of different ways. Thanks for visiting my little craft space! See you tomorrow, for day 2  Ellie x    

WOYWW 599!!

Image
  Good afternoon crafty friends!! Time for some more sharing of desks, my favourite part of a Wednesday! To join in with this kind community head over to The Stamping Ground, run by the lovely Julia. So above is my desk currently, just decided to light a candle, since this time of year is perfect for it. I adore candles and have been loving burning them as the nights draw in. Anyone else a candle addict? So also on my desk is a Greggs cappuccino I grabbed this morning as I needed to pop into work at 7:30am. Far to early to be expected to function ! There's a selection of stamped, coloured and fussy cut Christmas images, these will be used in my Christmas cards. Some friends have already made theirs and are posting them today, that most definitely makes me panic! Everything seems to be creeping up so fast and I am not even ready, however I am glad I will be able to spend my birthday and Christmas with my family. I hope you will all be able to do the same too. So quite a few of you m...

Feeling a bit glittery ~

Image
 Good morning crafty friends!! So today I just wanted to make a quick post to show a birthday card I've made. Its for a close friend of mine and I really enjoyed making it. I used my Glitter magic glue and glitters to add sparkly within the die cut design. The photo doesn't really catch the sparkles but its really pretty. I hope you are all well and staying safe, this time of year is hard for many, never mind with a pandemic on our hands. Stay safe and take care! Thanks for spending some of your day with me! Ellie x

WOYWW - 598 - Christmas

Image
  Good Morning lovely crafty friends,  thank you for the kind comments last week.  To join Julia and this amazing nosey desk searching blog writing weekly chatting crafty community, head over by following this !!! So, oh yeah my desk, from left to right, comp screen remote, pop paperclip off my planner, my pupper keeps pulling it off. My planner underneath the stack , then lots of Christmas stamps. The other day I stamped a load and coloured them, these still need to be stamped so were dumped on my planner. Finally on the right is my cuppa. At the top you can see a webcam and some Pebeo paint, I came home to find my other half using said paint, shocked doesn't cover it. Not much going on to be honest, still working. Although last night was interesting, my OH just finished eating his tea and decided to play with the pupper while I finished mine. Lyrax got so excited he leapt into the air, landed on me, which smashed my dinner plate and threw my tea all over the floor. Well...

WOYWW 592

Image
 Good Morning Friends Happy WOYWW! So today, my desk is a tad empty. Yesterday there was no room to move as I had finished the advent swap envelopes.  So I had a trip to Bristol so popped into Hobbycraft to grab a few things, one being this pack on pretty coloured cardstock. I have also been playing with some more acrylic pouring, this was a dirty pour using the left over paint I had from making a gift. I use the spotty paper cups to pour the paint. I just wanted to apologise that I do take a few days to catch up, on reading your lovely blogs. I hope you don't mind as I like to relax with a cuppa and have a read of a few each day. Speaking of a cuppa I am enjoying a coffee right now, ready to start the day. If you want to join in with this desk madness, head over too The Stamping Ground! Thank you for spending some of your day with me. Ellie x

WOYWW 591 - STICKER EXPLOSION

Image
  Good Morning! Well I don't know how its Wednesday already, but here we are! Nip over to The Stamping Ground if you enjoy snooping at other desks, just like me. So this week my desk looks like a disaster, not sure where to start with it to be honest. So front and centre is my A5 Filofax planner. To the left is a stack of stickers and stationery goodies. On Sunday was an online event a friend and I organised for the planner community. It went really well and I am thrilled to bits everyone who took part enjoyed it. Head over to The South West Planner Club on social media if you are interested in next years event at all. Today is filled with appointments as usual, after I plan to get some cards made for family birthdays. I am also taking part in an Advent calendar swap where I make 25 envelopes of crafty goodies, everyone taking part does this and at the end we all receive a full advent , each day an envelope from those involved. I do hope that makes sense.  you may have notice...

Grungy - Halloween series #8

Image
 Good Afternoon all! So today I'm sharing a Halloween card I made using some bits I had extra of or were lying around. I searched in my background pages drawer and came across this dark, grunge effect sheet. This was made using water with some distress inks and smearing the colour on against my glass mat. Then from a recent Indigoblu magazine, I selected a stamp that matches the effect I was going for. I stamped it using Versafine onyx black ink.  From some stamped and coloured images I made in advance, I fussy cut some leaf clusters. Seperating each leaf, I arranged them on the opposite corner to the stamping. These leaves were coloured using Zig Kuretake clean colour real brush markers.  I adhered my leaves using collall glue, I chose to make them have the appearance of falling. Finally I backed this topper onto deep Aubergine Cardstock leaving a small border. If you wished to, a small halloween sentiment could be heat embossed on the right side of the card also.  ...

Acrylic pouring

Image
  Good Evening crafty friends! Just wanted to share my first acrylic pour with you. I've been dying to have a go, so finally took the plunge.  I decided to use pink, blue and white acrylic paints. I grabbed some small canvases from The works store. My cell creator is by Dina wakley, the pouring medium is from craftstash and the acrylic paints are by Pebeo.  To get this effect I poured the colours one at a time on top of the previous, in the centre of the canvas. I added a couple drips of cell creator in the pots holding each colour. Then I tilted the canvas to ensure the colour covered the surface. I left it to dry overnight and I love it so much! Cannot wait to have another play! Thank you for spending some of your day with me.  Ellie x Products: Pebeo Acrylic paint Pouring medium and cell creator Art canvases

Crafty Haul from Craftstash

Image
 Good Morning friends! I just wanted to do a quick post between the Halloween crafting, to show you my crafty haul. These goodies I purchased from Craftstash and cannot wait to play with them. Craftstash.co.uk If you have not ordered from Craftstash before, I would highly recommend them.  So this is what I ordered:  Acrylic pouring Fluid, this is added to acrylic paint to change the consistency and make up of the paint.  Dina Wakley Cell Creator, this is added in small amount to the paint before or after pouring. It them makes the paint react, leaving small areas with a visible cell appearance. Dylusions Acrylic paint, I bought these paints in the colours: Periwinkle blue, Mango punch and Tropical sangria. These are such beautiful vibrant paints. Dina Wakley mixed media tags, in this pack there is 5 of two sizes. There are YouTube videos on Dina's channel of her using these tags. Definitely worth a watch! John next door, craft magazine and products set. This box is i...

Halloween series #6 - Spooky mail

Image
 Morning friends!  This morning I want to share this card with you. As with the last post, this background was made using a Gel press.  I cut a thin panel out of this background, I then embossed it using a Leaf vine die from Crafters Companion. I did this twice, so the panel was all embossed. I have this adorable stamp and coordinating die set from AlteNew called Snail mail. With my Distress Oxide inks, I stamped out the image in greens and oranges. Next die cut each cute envelope and stamped the heart image in black ink on the top flap, of the envelope image. I applied a generous amount of Glossy accents to each heart and left to dry overnight.  In the morning, using collall glue I mat and layered the panel to plain black card stock, then onto a white card base. Thank you for spending some of your day with me! Ellie x Products: Altenew snail mail stamp Glossy accents Distress oxide ink pads Versafine black ink

Halloween series #5 - Gel press background

Image
 Evening friends, So tonight I want to share a card that has a more neutral design. This could certainly be given as a Halloween card though. All of these cards I've created can be altered as you wish to, if you would like to make them more spooky. This background I created using a gel press. I applied Pebeo acrylic paints and moved them around using a brayer. Once dry, I trimmed the background down and backed onto black card stock. I dived into my vast collection of patterned papers and found this cute toadstool print. Using my lawn fawn stitched circle dies, I cut out a circle that would fit nicely onto my background.  The left over black plain card stock, I die cut the Olive tree die from Joanna sheen, also the little star cluster die from Lawn Fawn. To add a little extra sparkle, I brushed over the die cut images with my Wink of stella pen. I adhered these elements to the circle, then the circle foam taped to the background for some extra dimension. To complete the card, t...

Halloween series #4 - bit of blending

Image
 Hello friends, I hope Friday is treating you well! So for this Halloween card I wanted a silhouette effect over a night sky. To begin this slimline landscape card I cut a panel 6.5cm x 14.8cm, out of white card stock. Using a piece of scrap card I cut a sloping hill shape and masking taped either side to my panel of card. For blending I used some foam squares and my oxide ink pads. The first colour blended against my hillside is Seedless Preserves, then above it with Wilted Violet, then above that I used Faded Jeans. I moved back and forward between the colours to get a smooth blend. Once I was happy with the sky colours, I flipped my hillside over to the white area was exposed and the sky was covered. I then applied a light blend of Frayed Burlap to the hillside area.  I then removed the card stock to reveal the sky and hillside complete. using a selection of silhouette stamps by unknown companies, I added archival jet black ink and stamped them using the Tim Holtz stamping ...

Halloween series #3 - No Halloween stamps

Image
  Hello friends, I hope you are all having a good Thursday!! So I've finally got round to making a card, using the background from the previous blog post. First I grabbed the Lawn Fawn Baah Humbug stamp set, I selected the standing sheep stamp. I stamped it using Archival Jet black ink and coloured three sheep. Also from that set I used the bow stamp twice and coloured both purple. All colouring I did for these card, I used my Kuretake clean colour - real brush markers. Since I don't own any Halloween stamps, I had a rummage in my collection. I found an adorable stamp set by Heffy Doodle called Lucky friends, in this set is a pot of gold. I thought this would make a perfect cauldron, again I stamped two and coloured with my markers. After colouring and fussy cutting my images I glued a black card stock piece to cover the card base. Then I sliced my patterned background in half, I ensured each piece had a small border of the black card showing. I adhered all the card stock and i...

Halloween series #2 - backgrounds

Image
  Good Morning crafty friends!! So today we aren't making a completed card, I wanted to share a couple of backgrounds I made with you all. So to start I created both these backgrounds in the same way, just with different colours. These backgrounds are on Clarity Stamp A6 coated card, I made these using a mixed media plate by Nellie's Craft.  I placed the A5 piece of card on a piece of scrap card stock to minimise mess as much as possible. Next I grabbed my Gansai Tambi watercolours - 36 colour set. These are beautiful watercolours and if you are in the market for some then I would certainly recommend them. To start I applied some orange watercolour to the mix media plate , nothing neat or tidy, just sploshes of it here and there. I then carefully flipped the plate over and pressed it onto the card. I used my fingers to press the plate against the card and move the colour around. I repeated this step a second time then did this again with some purple watercolour. Its important ...

Happy Monday Friends! - Halloween series #1

Image
  Good Morning lovely friends! I hope you all have a fantastic start to the week, I have a week off which i plan to thoroughly enjoy and do lots of crafting! Today I wanted to talk Halloween and share some crafty Halloween bits I have been doing. I have always enjoyed All Hallows Eve, the history of it and the magical feel that night has. Now I get to enjoy it further my creating spooky makes that are great fun! Yesterday I began the tedious but necessary task of clearing up my craft desk. Then got crafty... So to begin my Halloween crafts series, I thought I would start with a simple card.  First I used two distress inks, Carved pumpkin and crushed olive to make my background. I used a wet paintbrush and applied the green ink first followed by the orange to create a watercolour effect. Next using a garnet ink from Artistry inks with a stencil from Clarity Stamp. The stencil is called a 7x7 Art stencil and is a grungy frame effect. I applied the ink using an ink blending brush...

Finally a new craft room!

Image
  Good Morning Crafty Friends!! So as many of you know I moved house as I mentioned in my last post, i finally have a basic craft room. It isn't complete by any means but its my space and I love it.  This year has been insane as it has been for many of you, so having a space to craft and step away is just what i needed. We also have a new addition to our little family, we have a lurcher pup who is now 13 weeks old. He is crazy but certainly brings many laughs which is well needed.  This is only a brief post to check in on you guys but fingers crossed these posts may become more regular now I have a pc set up in my craft space. Below is a picture of a card I made for my mothers birthday, its simple but nice and colourful.  Thank you for spending some of your day with me! Ellie x