Posts

Showing posts with the label halloween card

Boo!! Halloween series #9

Image
 Good evening crafty friends! So tonight I wanted to share a simple Halloween card with you all! The cute pumpkins were cut using my Cricut explore air 1. I coloured them using my zig kuretake clean colour real brush markers using a water brush to blend the colours.  After cutting a square from plain white card, I inked it using my cosmic shimmer chalk cloud blending inks. I applied a grey using a blending sponge. Once dry I glued the pumpkins to the bottom half of the card and trimmed off the excess. With a white gelly roll pen, I wrote out the word "Boo!". I accented the word with a glittery gelly roll pen. I adhered this panel to some scrap patterned paper using collall glue. To finish up, this was all glued to a white card base. I'm loving using my new machine I cannot wait to have a proper look at all the SVG cut files available. Thank you for spending some of your day with me.  Ellie x Products: Zig Markers Cricut cutting machine Gelly roll pens Chalk cloud ink Sent...

Halloween series #6 - Spooky mail

Image
 Morning friends!  This morning I want to share this card with you. As with the last post, this background was made using a Gel press.  I cut a thin panel out of this background, I then embossed it using a Leaf vine die from Crafters Companion. I did this twice, so the panel was all embossed. I have this adorable stamp and coordinating die set from AlteNew called Snail mail. With my Distress Oxide inks, I stamped out the image in greens and oranges. Next die cut each cute envelope and stamped the heart image in black ink on the top flap, of the envelope image. I applied a generous amount of Glossy accents to each heart and left to dry overnight.  In the morning, using collall glue I mat and layered the panel to plain black card stock, then onto a white card base. Thank you for spending some of your day with me! Ellie x Products: Altenew snail mail stamp Glossy accents Distress oxide ink pads Versafine black ink

Halloween series #5 - Gel press background

Image
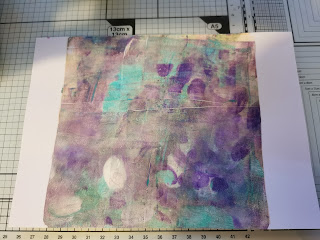
 Evening friends, So tonight I want to share a card that has a more neutral design. This could certainly be given as a Halloween card though. All of these cards I've created can be altered as you wish to, if you would like to make them more spooky. This background I created using a gel press. I applied Pebeo acrylic paints and moved them around using a brayer. Once dry, I trimmed the background down and backed onto black card stock. I dived into my vast collection of patterned papers and found this cute toadstool print. Using my lawn fawn stitched circle dies, I cut out a circle that would fit nicely onto my background.  The left over black plain card stock, I die cut the Olive tree die from Joanna sheen, also the little star cluster die from Lawn Fawn. To add a little extra sparkle, I brushed over the die cut images with my Wink of stella pen. I adhered these elements to the circle, then the circle foam taped to the background for some extra dimension. To complete the card, t...

Halloween series #4 - bit of blending

Image
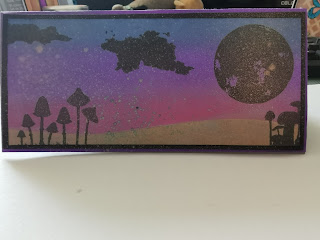
 Hello friends, I hope Friday is treating you well! So for this Halloween card I wanted a silhouette effect over a night sky. To begin this slimline landscape card I cut a panel 6.5cm x 14.8cm, out of white card stock. Using a piece of scrap card I cut a sloping hill shape and masking taped either side to my panel of card. For blending I used some foam squares and my oxide ink pads. The first colour blended against my hillside is Seedless Preserves, then above it with Wilted Violet, then above that I used Faded Jeans. I moved back and forward between the colours to get a smooth blend. Once I was happy with the sky colours, I flipped my hillside over to the white area was exposed and the sky was covered. I then applied a light blend of Frayed Burlap to the hillside area.  I then removed the card stock to reveal the sky and hillside complete. using a selection of silhouette stamps by unknown companies, I added archival jet black ink and stamped them using the Tim Holtz stamping ...

Halloween series #3 - No Halloween stamps

Image
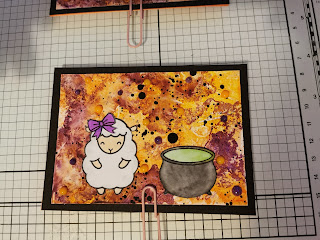
  Hello friends, I hope you are all having a good Thursday!! So I've finally got round to making a card, using the background from the previous blog post. First I grabbed the Lawn Fawn Baah Humbug stamp set, I selected the standing sheep stamp. I stamped it using Archival Jet black ink and coloured three sheep. Also from that set I used the bow stamp twice and coloured both purple. All colouring I did for these card, I used my Kuretake clean colour - real brush markers. Since I don't own any Halloween stamps, I had a rummage in my collection. I found an adorable stamp set by Heffy Doodle called Lucky friends, in this set is a pot of gold. I thought this would make a perfect cauldron, again I stamped two and coloured with my markers. After colouring and fussy cutting my images I glued a black card stock piece to cover the card base. Then I sliced my patterned background in half, I ensured each piece had a small border of the black card showing. I adhered all the card stock and i...