Posts

Showing posts with the label pebeo paint

What's on your work desk Wednesday 590

Image
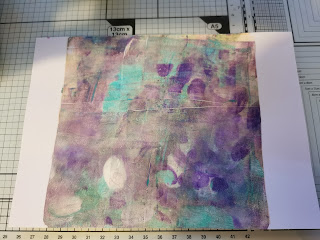
 Good Morning! I hope you are all well and staying safe. It's has been quite some time since I have been able to take part in this weekly tradition. I really have missed it. To take part, or join in aswell, head over to the Stamping ground here . On my desk today, there is a bit of a mixture going on. I'm mid way through a few things and don't have enough time in the day.  There is a canvas that I have recently tried acrylic pouring on. It's great fun! I'm also painting a picture frame for a project I've just started.  I have a collection of cut images in a heap aswell. These are from my Cricut machine and I am loving owning one of these finally. Most of these will be going on cards for my Halloween series.  Thank you for spending some of your day with me! Ellie x 

Acrylic pouring

Image
  Good Evening crafty friends! Just wanted to share my first acrylic pour with you. I've been dying to have a go, so finally took the plunge.  I decided to use pink, blue and white acrylic paints. I grabbed some small canvases from The works store. My cell creator is by Dina wakley, the pouring medium is from craftstash and the acrylic paints are by Pebeo.  To get this effect I poured the colours one at a time on top of the previous, in the centre of the canvas. I added a couple drips of cell creator in the pots holding each colour. Then I tilted the canvas to ensure the colour covered the surface. I left it to dry overnight and I love it so much! Cannot wait to have another play! Thank you for spending some of your day with me.  Ellie x Products: Pebeo Acrylic paint Pouring medium and cell creator Art canvases

Halloween series #5 - Gel press background

Image
 Evening friends, So tonight I want to share a card that has a more neutral design. This could certainly be given as a Halloween card though. All of these cards I've created can be altered as you wish to, if you would like to make them more spooky. This background I created using a gel press. I applied Pebeo acrylic paints and moved them around using a brayer. Once dry, I trimmed the background down and backed onto black card stock. I dived into my vast collection of patterned papers and found this cute toadstool print. Using my lawn fawn stitched circle dies, I cut out a circle that would fit nicely onto my background.  The left over black plain card stock, I die cut the Olive tree die from Joanna sheen, also the little star cluster die from Lawn Fawn. To add a little extra sparkle, I brushed over the die cut images with my Wink of stella pen. I adhered these elements to the circle, then the circle foam taped to the background for some extra dimension. To complete the card, t...

Sentiment free cards

Image
For today I am showing a sentiment free card I recently made. This is the card its simple but effective I think. To start I selected a background paper I thought would suit my colours used for the topper. To create the topper I cut down some white cardstock and covered it with blue pebeo, acrylic paint. I dried it with my heat gun, then covered with PVA glue. Next I dried the layer of glue completely before covering the page with white pebeo paint. Once all the white paint is dry I took a piece of fine grit sandpaper and sanded the edges. This caused the blue paint to peep out around the edges of the page, I think it gave lovely rustic appearance. Using my memento black ink I stamped one of my favourite stampendous stamps. When the ink is dry I sanded over the stamped image making it lighter in colour with distressed edges on the stamp. When I was happy I stuck this topper onto the patterned paper, I chose not to use a sentiment as I think sometimes the topper is enough in its...