Posts

Showing posts with the label clarity stamp

Halloween series #2 - backgrounds

Image
  Good Morning crafty friends!! So today we aren't making a completed card, I wanted to share a couple of backgrounds I made with you all. So to start I created both these backgrounds in the same way, just with different colours. These backgrounds are on Clarity Stamp A6 coated card, I made these using a mixed media plate by Nellie's Craft.  I placed the A5 piece of card on a piece of scrap card stock to minimise mess as much as possible. Next I grabbed my Gansai Tambi watercolours - 36 colour set. These are beautiful watercolours and if you are in the market for some then I would certainly recommend them. To start I applied some orange watercolour to the mix media plate , nothing neat or tidy, just sploshes of it here and there. I then carefully flipped the plate over and pressed it onto the card. I used my fingers to press the plate against the card and move the colour around. I repeated this step a second time then did this again with some purple watercolour. Its important ...

Fingers and sponges

Image
Good afternoon everyone! So today I would like to share an art journal page I have just finished. Here is the step by step :) I began with a black page, I applied white acrylic paint by pebeo. I did this roughly as I wanted an imperfect look. Next I used my fingers( yes get stuck in hehe) to apply blue paint and blue stamp paint. Again do this messily, it's not meant to be perfect. I next, using my finger, again, smeared the page with little areas of crazing medium. I dried this with a heat gun. This is the result so far. You should be able to see little areas of white peeking through. If not, get the white and pick a finger to scribble some on with. I next used an alphabet stencil from clarity. I applied seedless preserves oxide ink using a sponge. I moved the stencil about as I didn't want straight tidy lines. Heat dried again. Grab some patterned paper that matches the colour scheme. Tear bits up. I stuck these torn pieces down with Matt mod po...

A few tiny makes from my coloured images

Image
Evening friends! Sorry about not blogging yesterday, I didn't have any time to craft unfortunately. So this evening I used some of the coloured image I shared recently to make small toppers, these can also be used as tags. Both stamped images are by Clarity stamps. So to start both of the example off, I fussy cut the stamped images. Next I used distress ink on the toadstool image and artistry ink on the owl image. I used a blending tool to apply the inks to a white piece of card. I stuck the images using Cosmic shimmer acrylic glue. To complete the toadstool image I added nuvo drops and ran a pink pen around the edges. To complete the owl design, I die cut a stitched circle by lawn fawn from the inked background. Next flicked water at the inked circle and blotted with kitchen roll. This lifts the ink leaving a splattered effect. I then adhered my owl and drew a branch using ink and a paintbrush.  Thank you for spending some of your day with me. Crafty hugs and se...

WOYWW 445 - 13.12.17

Image
Afternoon crafty friends! Happy WOYWW, I can't believe how this week has flown by. To visit more crafty desks for inspiration swing by and see Julia at the stamping ground . My desk isn't very busy today as I have been doing a bit of sofa crafting. So on my desk, from left to right, a project from a previous blog post in the top left corner. A pack of wet wipes, a wet wipe I used to clean a stamp with. A project I am half way through and my two new Tombo mono erasers. Nothing too exciting hehe . So today I have been painting and watercolouring and stamping. Thank you for spending some of your day with me! Crafty hugs and happy WOYWW! Ellie x

Canvas board part 2...

Image
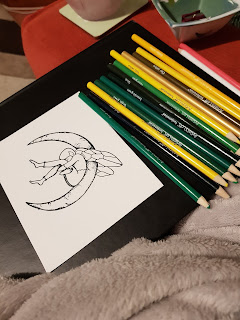
Good Evening friends! It's been freezing cold here today so the fire is lit now. To continue with my piece I stamped a moon fairy by Clarity stamp. I used black Momento ink and coloured using colour pencils on white cardstock. I then fussy cut this out using my tonic spring loaded scissors. Please visit clarity stamp here . I adhered it using Cosmic shimmer acrylic glue and have left it to dry. I will be finishing this project off tomorrow as I don't want to rush it and ruin it. Have a fab evening everyone. Thank you for spending some of your day with me. Crafty hugs and see you tomorrow. Ellie x 

A junk journal I made fairly recently...

Image
Hello friends! So today is mainly a photo filled blog but I wanted to show some of you that haven't seen, the first junk journal I made. I am really happy with it now it's complete but I haven't got round to writing in it yet. Please leave a comment and let me know about what you put in your journals and what you think of mine. Thank you for spending some of your day with me. Crafty hugs and see you tomorrow! Ellie x

Playing around making backgrounds..

Image
Hello !! Today I spent the afternoon having a mess around with a few products and made a couple of backgrounds. For the first background I used three of my cosmic shimmer paints, I put a small blob of each and used the brayer making the colours blend. The shimmer in these paints is gorgeous!! Using the brayer I applied the paint across the page, I don't want perfect coverage as I wanted some interest in the background. Its not visible in the photo but shimmer is so beautiful. Then I used my Tim holtz scissors and fussy cut some flower and butterfly images. I adhered these with my collall glue, its super strong . For my second background I used a stamp set by Clarity and used one leaf stamp . I stamped this single stamp image using Memento dewdrop ink pads in pink and purple. On some of the leaf impressions I used both ink pads at the same time to create a different effect. I stamped the leaf all over my card panel and I really like the finished result, its pa...