Posts

Showing posts with the label halloween crafts

Halloween series #6 - Spooky mail

Image
 Morning friends!  This morning I want to share this card with you. As with the last post, this background was made using a Gel press.  I cut a thin panel out of this background, I then embossed it using a Leaf vine die from Crafters Companion. I did this twice, so the panel was all embossed. I have this adorable stamp and coordinating die set from AlteNew called Snail mail. With my Distress Oxide inks, I stamped out the image in greens and oranges. Next die cut each cute envelope and stamped the heart image in black ink on the top flap, of the envelope image. I applied a generous amount of Glossy accents to each heart and left to dry overnight.  In the morning, using collall glue I mat and layered the panel to plain black card stock, then onto a white card base. Thank you for spending some of your day with me! Ellie x Products: Altenew snail mail stamp Glossy accents Distress oxide ink pads Versafine black ink
Halloween series #4 - bit of blending

Image
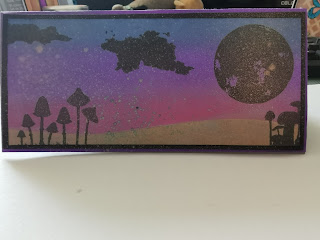
 Hello friends, I hope Friday is treating you well! So for this Halloween card I wanted a silhouette effect over a night sky. To begin this slimline landscape card I cut a panel 6.5cm x 14.8cm, out of white card stock. Using a piece of scrap card I cut a sloping hill shape and masking taped either side to my panel of card. For blending I used some foam squares and my oxide ink pads. The first colour blended against my hillside is Seedless Preserves, then above it with Wilted Violet, then above that I used Faded Jeans. I moved back and forward between the colours to get a smooth blend. Once I was happy with the sky colours, I flipped my hillside over to the white area was exposed and the sky was covered. I then applied a light blend of Frayed Burlap to the hillside area.  I then removed the card stock to reveal the sky and hillside complete. using a selection of silhouette stamps by unknown companies, I added archival jet black ink and stamped them using the Tim Holtz stamping ...

Halloween series #3 - No Halloween stamps

Image
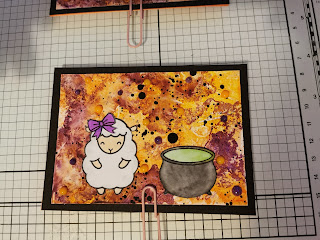
  Hello friends, I hope you are all having a good Thursday!! So I've finally got round to making a card, using the background from the previous blog post. First I grabbed the Lawn Fawn Baah Humbug stamp set, I selected the standing sheep stamp. I stamped it using Archival Jet black ink and coloured three sheep. Also from that set I used the bow stamp twice and coloured both purple. All colouring I did for these card, I used my Kuretake clean colour - real brush markers. Since I don't own any Halloween stamps, I had a rummage in my collection. I found an adorable stamp set by Heffy Doodle called Lucky friends, in this set is a pot of gold. I thought this would make a perfect cauldron, again I stamped two and coloured with my markers. After colouring and fussy cutting my images I glued a black card stock piece to cover the card base. Then I sliced my patterned background in half, I ensured each piece had a small border of the black card showing. I adhered all the card stock and i...

Happy Monday Friends! - Halloween series #1

Image
  Good Morning lovely friends! I hope you all have a fantastic start to the week, I have a week off which i plan to thoroughly enjoy and do lots of crafting! Today I wanted to talk Halloween and share some crafty Halloween bits I have been doing. I have always enjoyed All Hallows Eve, the history of it and the magical feel that night has. Now I get to enjoy it further my creating spooky makes that are great fun! Yesterday I began the tedious but necessary task of clearing up my craft desk. Then got crafty... So to begin my Halloween crafts series, I thought I would start with a simple card.  First I used two distress inks, Carved pumpkin and crushed olive to make my background. I used a wet paintbrush and applied the green ink first followed by the orange to create a watercolour effect. Next using a garnet ink from Artistry inks with a stencil from Clarity Stamp. The stencil is called a 7x7 Art stencil and is a grungy frame effect. I applied the ink using an ink blending brush...