Posts

Showing posts from July, 2018

WOYWW - 475 - 11th July 2018

Image
Happy WOYWW! I can't believe it's Wednesday again, this week has flown by. So before I share my desk with you all, please feel free to join in or have a nose at some more desks. Click here to swing by the stamping ground to join in. You have all been so lovely and excited about my grimoire project so I shall share some more of the progress with you. So this first pic is the mess I've left my desk in after crafting most of Tuesday. I've got tuck spots and pockets made from vintage book pages. They have all been distressed with oxide inks. My new tonic glue stick that goes on purple and dried clear. Really enjoying using it so far, works well for pocket making. Here is a pile of ephemera/pockets and envelopes that will be going into my grimoire eventually. Do you like my flower pot on the far left? Hehehe More mess!!! The pens I'm using to write in different fonts. Grimoire so far. The pile on the right is pages with writing on. The left pile...
Little embellishment making

Image
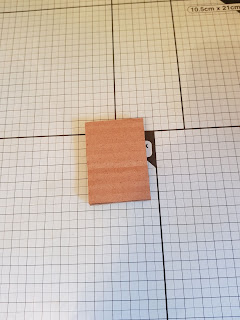
Good day friends! So today, a step by step of a little, quick and easy embellishment. To begin, I cut two pieces of card board and stuck, one onto the other. Next I used by black gesso and painted the cardboard. Once dry I covered the front with my wink of Stella pen. To seal this I applied some Matt mod podge onto the dry glitter. So pretty and sparkley! Using a metal embellishment from my stash? I thread some black shiney string through the loop. I adhered this metal with collall glue. Finished! With painty fingers hehe! Thank you for spending some of your day with me. Crafty hugs Ellie x

My latest makes

Image
Hello friends! Today I wanted to show you some of the creations that have kept me busy lately, enjoy! This first picture is some parchment I have worked on using my clarity groovi system. Certainly worth a buy, very relaxing. This isn't yet finished, I am going to add some colour to it. This is a recent ATC I made. I used paints and dripped them over the ATC and then ripped up some patterned paper. I adhered the papers with mod podge and finally used glitter paste through a bubble stencil. Thank you for spending some of your day with me! Crafty hugs Ellie  x

WOYWW -474 4th July- My busy desk

Image
Good morning friends and happy WOYWW! It's so much fun seeing each others desks and taking part, visit the stamping ground to get involved. Thank you to everyone that visited my desk last week and left some lovely comments. Today I have an appointment so will probably visit other desks late afternoon. So here is my desk, very busy this week... My grimoire binding screws arrived, yay! I tried them out and they fit perfectly. In the background some finished atcs. Hole punch at the ready for my pages.  The inside back page of my grimoire so far. My huge mod podge pot. Love it! A selection of 12x12 pages I trimmed down for my book. Adore these, gorgeous florals and William Morris. Love his art <3 Coffee !  Using my gansai Tambi watercolours to make some pages that I can write over if I wish. My favourite watercolours, so much fun to play with. Start of a little embellishment use card board. Finished little embellishment....

4x4 cardstock tile

Image
Good crafty afternoon! So today is a step by step of decorating a tile. I stacked and glued some thick cardstock to make the tile thick and heavy. For the base of the tile I'm using a piece of kitchen roll I used to mop up a different project. I glued these two thick cardstock squares ontop of eachother using collall glue. Next I glued the tissue down using my Matt mod podge. letting it dry Now I trimmed off the excess.     I used some patterned tissues and used mod podge again to adhere. Using an old credit or gift card I dipped it in white acrylic paint, then dragged the card in different directions on the tile.     I used my splodges stamp set by Phill Martin and used versafine black ink. I grabbed some paints and did a patch of paint in the centre of the tile. Using Faber castell pastels I scribbled and smudged ontop of the paint patch. To finish up, I found some co ordinating gems and ephemera. I ad...

Fingers and sponges

Image
Good afternoon everyone! So today I would like to share an art journal page I have just finished. Here is the step by step :) I began with a black page, I applied white acrylic paint by pebeo. I did this roughly as I wanted an imperfect look. Next I used my fingers( yes get stuck in hehe) to apply blue paint and blue stamp paint. Again do this messily, it's not meant to be perfect. I next, using my finger, again, smeared the page with little areas of crazing medium. I dried this with a heat gun. This is the result so far. You should be able to see little areas of white peeking through. If not, get the white and pick a finger to scribble some on with. I next used an alphabet stencil from clarity. I applied seedless preserves oxide ink using a sponge. I moved the stencil about as I didn't want straight tidy lines. Heat dried again. Grab some patterned paper that matches the colour scheme. Tear bits up. I stuck these torn pieces down with Matt mod po...

Pink ATC

Image
Let's get crafting! So today is a quick post just showing a cute pink ATC I made to send, to a family member. To start, I selected a page from an Anna Marie paper pad I love. I cut a strip the width of the ATC, from my favourite section of that sheet. I used my picked raspberry distress oxide to ink the edges of the paper. I adhered the paper to the ATC using cosmic shimmer glue. I then went back over the edges of the paper and ATC with the pink oxide ink. Next I grabbed my pink glittery washi tape and stuck some across the top of the ATC. To co ordinate, I added a pink flat back pearl to the top left corner, ontop of the washi.  I have a beautiful pink, flowery metal embellishment that was begging to be used. So out came the hot glue gun. I stuck this to the opposite corner. The centre seemed empty by this point, therefore I grabbed my distress Matt collage medium and added, cosmic shimmer powder in purple. Using a pallets knife, I smeared some d...